Santa Rita Pale Ale
The more complex sister to our Santa Catalina Pale Ale, this beer is bright and full of citrus notes from the Cascade hop addition. While this beer is hop-forward, it has minimal bitterness, which allows the malt backbone to carry the citrus flavors without overwhelming your palate. This is a great beer for any season.
What You Get
1 Can of Northwest Pale Ale Brewing Extract (HME)
1 Packet of Dry Brewing Yeast (Under the Lid of the Brewing Extract, you won't be using this)
1 Packet of Carapils Malt
1 Packet of Cascade Pellet Hops
1 Packet of US-05
2 Hop Sacks
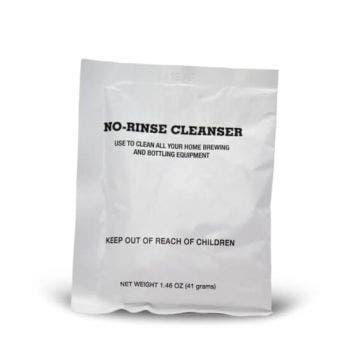
1 Packet of No-Rinse Cleanser
For Fans Of
Sierra Nevada Pale Ale
Deschutes Mirror Pond Pale Ale
Brew Specs
Flavor: Hoppy
Original Gravity: 1.060
Final Gravity: 1.015
ABV: 5.9%
SRM: (Color): 7
IBU: (Bitterness): 42
STEP 1: SANITIZING
Cleaning is one of the most important steps in brewing. It kills microscopic bacteria, wild yeast, and molds that may cause off-flavors in your beer. Make certain to clean all equipment that comes in contact with your beer by following the directions below:
1. Fill clean keg with warm water to line mark 1 on the back, then add ½ pack (about 1 tablespoon) of No-Rinse Cleanser and stir until dissolved. Once dissolved, the solution is ready to use. Save the remaining ½ of No-Rinse Cleanser because you will need it for bottling.
2. Screw on lid and swirl the keg so that the cleaning solution makes contact with the entire interior of the keg, including the underside of the lid. Note that the ventilation notches under the lid may leak solution. Allow to sit for at least 2 minutes and swirl again.
3. To clean the spigot, open it fully and allow liquid to flow for 5 seconds and then close
4. Pour the rest of the solution from the keg into a large bowl. Place your spoon/whisk, can opener and measuring cup into the bowl to keep them cleaned throughout the brewing process. Leave them immersed for at least 2 minutes in cleaning solution prior to using.
5. After all surfaces have been thoroughly cleaned, do not rinse or dry the keg or utensils. Return lid to top of keg, proceed immediately to brewing.
STEP 2: BREWING
Brewing beer is the process of combining a starch source (in this case, a malt brewing extract) with yeast. Once combined, the yeast eats the sugars in the malt, producing alcohol and carbon dioxide (CO2). This process is called fermentation.
1. Remove the yeast packet from under the lid of the can of Brewing Extract then place the
unopened in hot tap water.
2. Add the grains to a Muslin Hop Sacks tying it closed.
3. Using a measuring cup, pour 6 cups of water into your clean 4-quart or larger pot (Use just
enough water to cover the grains). Bring your pot of water up to above 155 degrees F.
4. Add the grain sack to the hot water and steep for 30 minutes between 155-165 degrees.
5. Carefully lift the grain sack out of the pot, and place into a strainer/colander. Rinse the sack
over the pot with 1 cup of hot water each. Let drain. Do NOT squeeze the grain bag. Discard
grain bag.
6. Place the packet of pellet hops into the 2nd hop sack tying it closed, then trim away excess
material.
7. Bring the grain water to a low rolling boil, add in hop sack, and remove from heat.
8. Open the can of Brewing Extract and pour the contents into the hot mixture in your pot. Stir
until thoroughly mixed. This mixture of unfermented beer is called wort.
9. Fill your fermenter with cold tap water to the mark 1 on the back. If using any other fermenter
this would be approximately 1 gallon of water.
10. Pour the wort, including the hop sacks, into your fermenter, and then bring the volume of the
fermenter to mark 2 by adding more cold water. Leave the hop sacks in the wort for the duration
of fermentation. (If you have a different fermenter top it off with cold water to the 8.5-liter
mark).
11. Stir your wort mixture vigorously with your sanitized spoon or whisk.
12. Sprinkle the US-05 yeast packet into the keg, and screw on the lid. Do not stir.
Put your fermenter in a location with a consistent temperature between 70° and 76° F (21°-
24° C), and out of direct sunlight. Ferment for 21 days.
STEP 4: BOTTLING & CARBONATING
After 21 days, taste a small sample to determine if the beer is fully fermented and ready to bottle. If it tastes like flat beer, it is ready. If it’s sweet, then it’s not ready. Let it ferment for 3 more days (24 total). At this point, it is time to bottle. Do not let it sit in the fermenter for longer than 24 days total.
1. When your beer is ready to bottle, fill a 1-gallon container with warm water, then add the remaining ½ pack of the No-Rinse Cleanser and stir until dissolved. Once dissolved, it is ready to use
2. Distribute the cleaning solution equally among the bottles. Screw-on caps (or cover with a metal cap if using glass bottles) and shake bottles vigorously. Allow to sit 10 minutes, then shake the bottles again. Remove caps and empty all cleaning solutions into a large bowl. Use this solution to clean any other equipment you may be using for bottling. Do not rinse.
3. Add 2 Carbonation Drops to each 740-mL bottle. For 1-liter bottles, add 2 ½ drops; for ½-liter bottles add 1 drop. Alternatively, you can add table sugar using this table as a guide.
4. Holding the bottle at an angle, fill each bottle to about 2 inches from the bottle’s top.
5. Place caps on bottles, hand tighten, and gently turn the bottle over to check the bottle’s seal. It is not necessary to shake them.
6. Store the bottles upright and out of direct sunlight in a location with a consistent temperature between 70°-76°F or 21°-24°C. Allow sitting for a minimum of 14 days. If the temperature is cooler than suggested it may take an additional week to reach full carbonation.
TIP FROM OUR BREWMASTERS
After the primary carbonation has taken place your beer is ready to drink. We recommend putting 1 bottle in the refrigerator at first for 48 hrs. After 48hrs. give it a try and if it is up to your liking put the rest of your beer in the fridge. If it does not taste quite right, leave the bottles out at room temp for another week or so. Keep following this method until your brew tastes just how you like it.
This process is called conditioning and during this time the yeast left in your beer can help clean up any off-flavors. Almost everything gets a little better with time and so will your beer