Diablo IPA Complete Craft Refill

Diablo IPA Complete Craft Refill is rated 4.6 out of 5 by 121.
  • y_2024, m_4, d_18, h_3
  • bvseo_bulk, prod_bvrr, vn_bulk_3.0.41
  • cp_1, bvpage1
  • co_hasreviews, tv_30, tr_91
  • loc_en_US, sid_90-11975-00, prod, sort_[SortEntry(order=RELEVANCE, direction=DESCENDING)]
  • clientName_mrbeer
  • bvseo_sdk, p_sdk, 3.2.1
  • CLOUD, getAggregateRating, 255.61ms
  • REVIEWS, PRODUCT
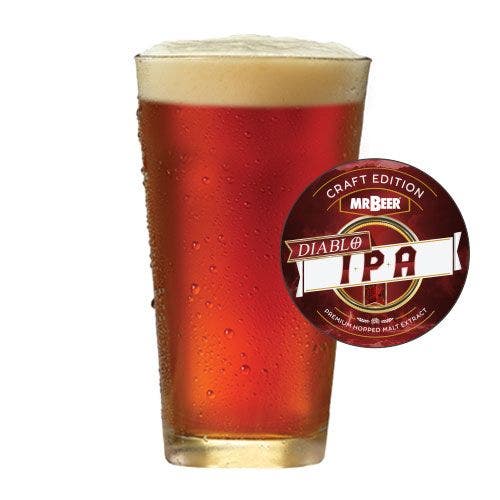
  • If you enjoy drinking AleSmith Double Red IPA, Surly Furious, or Sierra Nevada Celebration Ale then this is the Refill for you!
  • Our Refills come with everything that is needed to brew your next batch of great tasting beer. 
  • All of our Refills are done brewing within 10-14 days and designed for brewing 2-gallon batches. 
  • Mr. Beer's brewing extract is formulated and produced by master brewers at Coopers Brewery in Australia using the highest quality, all-natural barley and hops.
  • Every Mr. Beer Refill comes with Coopers proprietary brewing yeast that performs well in a wide range of temperatures. 
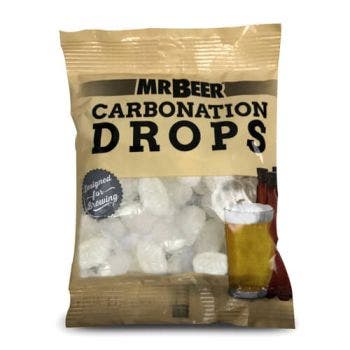
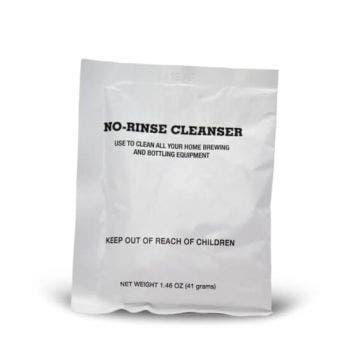
  • With this Refill, you will get our Diablo IPA HME, 1 bag of Carbonation Drops, 1 packet of No-Rinse Cleanser, and 1 packet of brewing yeast.
$27.95
SKU
90-11975-00
Customize Diablo IPA Complete Craft Refill

* Required Fields

Your Customization
Diablo IPA Craft Refill
Diablo IPA Complete Craft Refill

In stock

Subscription details
Wishlist

$27.95

Summary

    STEP 1: Sanitizing

    Cleaning is one of the most important steps in brewing. It kills microscopic bacteria, wild yeast, and molds that may cause off-flavors in your beer. Make certain to clean all equipment that comes in contact with your beer by following the directions below:

    1. Fill clean keg with warm water to line mark 1 on the back, then add ½ pack (about 1 tablespoon) of No-Rinse Cleanser and stir until dissolved. Once dissolved, the solution is ready to use. Save the remaining ½ of No-Rinse Cleanser because you will need it for bottling.

    2. Screw-on lid and swirl the keg so that the cleaning solution makes contact with the entire interior of the keg, including the underside of the lid. Note that the ventilation notches under the lid may leak solution. Allow to sit for at least 2 minutes and swirl again.

    3. To clean the spigot, open it fully and allow the liquid to flow for 5 seconds and then close.

    4. Pour the rest of the solution from the keg into a large bowl. Place your spoon/whisk, can opener and measuring cup into the bowl to keep them cleaned throughout the brewing process. Leave them immersed for at least 2 minutes in cleaning solution prior to using.

    5. After all, surfaces have been thoroughly cleaned, do not rinse or dry the keg or utensils. Return lid to the top of the keg, proceed immediately to brewing.


    STEP 2: BREWING

    Brewing beer is the process of combining a starch source (in this case, a malt brewing extract) with yeast. Once combined, the yeast eats the sugars in the malt, producing alcohol and carbon dioxide (CO2). This process is called fermentation.

    1. Remove the yeast packet from under the lid of the can of brewing extract, then remove the label from the can. Place the unopened can in hot tap water

    2. Using the clean measuring cup, pour 4 cups of water into your 4-quart or larger pot. Bring water to a boil, and then remove the pot from heat.

    3. Open the can of brewing extract from the bottom of the can and pour it into the pot. Stir until thoroughly mixed. This mixture is the wort.

    4. Fill the keg with cold water to line mark 1 on the back. The water must be cold (ideally from the refrigerator) with a temperature of 40-55°F/4-12°C. For the best results, we recommend using bottled spring water or filtered tap water. If using any other fermenter this would be approximately 1 gallon of water.

    5. Pour the wort into the keg and then bring the volume of the keg up to line mark 2 by adding more cold water. Mix vigorously with the plastic spoon/ whisk. Be careful to not scratch the inside of the keg, which could create small spaces for bacteria to grow. (If you have a different fermenter top it off with cold water to the 8.5-liter mark).

    6. Sprinkle the entire yeast packet into the keg and then screw on the lid. Do not stir.

    7. Allow your fermenter to sit for 10-14 days.

    Store the fermenter in a cool, dark place between 68-78°F/20-26°C for the yeast to work properly. The ideal temperature range is 70-72°F / 21-22°C. After a few days, the foam and activity will subside and your batch will appear to be dormant. However, the yeast is still at work, slowly finishing the fermentation process.


    STEP 3: Bottling & Carbonating

    After 10 days, taste a small sample to determine if the beer is fully fermented and ready to bottle. If it tastes like flat beer, it is ready. If it’s sweet, then it’s not ready. Let it ferment for 4 more days (14 total). At this point, it is time to bottle. Do not let it sit in the fermenter for longer than 24 days total.

    1. When your beer is ready to bottle, fill a 1-gallon container with warm water, then add the remaining ½ pack of the No-Rinse Cleanser and stir until dissolved. Once dissolved, it is ready to use.

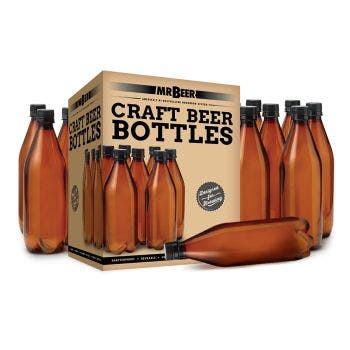
    2. Distribute the cleaning solution equally among the bottles. Screw-on caps (or cover with a metal cap if using glass bottles) and shake bottles vigorously. Allow to sit 10 minutes, then shake the bottles again. Remove caps and empty all cleaning solution into a large bowl. Use this solution to clean any other equipment you may be used for bottling. Do not rinse.

    3. Add 2 Carbonation Drops to each 740-mL bottle. For 1-liter bottles, add 2 ½ drops; for ½-liter bottles add 1 drop. Alternatively, you can add table sugar using this table as a guide

    4. Holding the bottle at an angle, fill each bottle to about 2 inches from the bottle’s top.

    5. Place caps on bottles, hand tighten, and gently turn the bottle over to check the bottle’s seal. It is not necessary to shake them.

    6. Store the bottles upright and out of direct sunlight in a location with a consistent temperature between 70°-76°F or 21°-24°C. Allow sitting for a minimum of 14 days. If the temperature is cooler than suggested it may take an additional week to reach full carbonation. 


    Tip from our Brewmasters

    After the primary carbonation has taken place your beer is ready to drink. We recommend putting 1 bottle in the refrigerator at first for 48 hrs. After 48hrs. give it a try and if it is up to your liking put the rest of your beer in the fridge. If it does not taste quite right, leave the bottles out at room temp for another week or so. Keep following this method until your brew tastes just how you like it. 

    This process is called conditioning and during this time the yeast left in your beer can help clean up any off-flavors. Almost everything gets a little better with time and so will your beer.

    Rated 4 out of 5 by Lwcools from Noob who doesn't like IPA I'm normally not a fan of IPA style beers, but I love crafts and my wife so, when she got the me the kit for xmas, was obliged to a) learn how to brew and b) enjoy at least one batch of IPA. I brewed as instructed, bottled at 3 weeks. Conditioned and carbonated for another month and 3 days. The end result- an IPA that I look forward to having again and am currently enjoying...
    Date published: 2016-03-10
    Rated 5 out of 5 by Bachs Brews from GREAT IPA! This was my 2nd brew I ever made and boy did I pick a great one! I'm slowly getting into liking IPA's and this knocked it out of the park. I add some 1/2 oz Galaxy hops to the brew process and dry hopped another 1/2 ounce after 2 weeks fermentation. The end product? Citrius/Grapefruit taste that packed a good punch. I was very pleased with the end product. My family members don't like IPA's and they all said it was fantastic! I don't even like grapefruit and I enjoyed this! Lol.
    Date published: 2016-04-27
    Rated 5 out of 5 by wolf79 from Awesome beer !! Brewed me first batch 2 months ago, success! I'll probably add some hops on my next try.
    Date published: 2016-02-17
    Rated 5 out of 5 by John from Great Beer! This turned out better than expected. Unfortunately my wife felt the same way so I had to share with her. I already ordered another round.
    Date published: 2015-10-20
    Rated 5 out of 5 by Bud1 from Diablo IPA If you prefer an IPA with the Pine Resin Note this is your IPA! This beer does get better with time. I did 3 weeks in fermenter, 3 weeks carbonation then 1 month in the fridge. Need time in the fridge for the bitterness to mellow out.
    Date published: 2017-04-24
    Rated 3 out of 5 by C Gram from Great Beer I tried this beer on my first brew with my kit, I let this brew work for two weeks and then tasted, it had a nice flat beer taste so bottled it up, waited about 14 days and then let it condition for about 2 days the taste was very bitter and just tasted bad over all, but after about 2 more weeks the taste got better and just kept getting better with time, I guess time, patients, and persistence is the key, this is a really good tasting beer, and I am not a big ipa guy, would make this brew again.
    Date published: 2017-03-25
    Rated 5 out of 5 by chasjake from Rivals any craft beer out there. Being a newbie to the Mr. Beer world, I have brewed this particular beer 4 or 5 times and have had excellent success every time! I have found it is best by adding the robust LME for extra kick. A good, solid hoppy flavor with what I would call a "peppery" lingering flavor. I highly recommend this for the first time brewers.
    Date published: 2016-01-08
    Rated 5 out of 5 by runfastryan from This beer will warm your soul, if you have one. When I first started brewing beer, I used it as an escape (you know something to keep myself busy). While I was searching for a hoppy IPA I could brew in my basement I ended up finding something much more important. I found myself. From the moment I opened the can I knew that there was no turning back. Although I had stored my refills in my cold basement, this one however, felt warm. As I poured the malt into a cold pot of water on my stove, to my amazement it began to boil. Stirring and Stirring I looked closely into the pot, and for a brief second I thought I saw him, Diablo. My glasses were beginning to fog up from the immense heat coming from the pot, and when I removed my glasses and peered in again …he was gone. Maybe he was never there, maybe the steam coming from the pot was messing with my vision. All I know is that when I looked into the pot again, I saw my reflection. I found myself.
    Date published: 2017-03-02
    • y_2024, m_4, d_18, h_3
    • bvseo_bulk, prod_bvrr, vn_bulk_3.0.41
    • cp_1, bvpage1
    • co_hasreviews, tv_30, tr_91
    • loc_en_US, sid_90-11975-00, prod, sort_[SortEntry(order=RELEVANCE, direction=DESCENDING)]
    • clientName_mrbeer
    • bvseo_sdk, p_sdk, 3.2.1
    • CLOUD, getReviews, 9.36ms
    • REVIEWS, PRODUCT

    how much yeast do you add to your beer for processing

    Asked by: tdowney
    The one small packet that comes with the can of extract. The packet is under the plastic top on the can. I do not use the provided yeast; I prefer to buy fresh Fermentis Safale US-05 at my local homebrew store. The provided yeast is 5 grams. The Safale US-05 is 11.5 grams. With twice as much yeast eating-up the sugar in the wort, the faster will your fermentation reach its end.
    Answered by: Link Hogthrob
    Date published: 2023-07-22

    Ok I received a Mr. Beer kit years ago, and never got to it. So I need EVERYTHING except the tank, which is 2 gallons/8.5 qts. Which refill kit and accessories do I need? Thank you.

    Asked by: Tony77
    Any of our Mr. Beer refills will work! If you have your tank, You just need some bottles and your refill! Cheers!
    Answered by: MRBEER
    Date published: 2021-09-27

    Do you no longer sell the 1 1/2 gallon refill kits?

    Asked by: wfm9854
    Hi, All of our Refills are for 2-Gallon batches of beer. We used to sell 1 Gallon Refills but we no longer do. Thank you, Robert
    Answered by: Robert Mr Beer
    Date published: 2021-12-20

    Will I also need to buy sugar to add to the kit

    Asked by: Dazman
    • y_2024, m_4, d_18, h_3CST
    • bvseo_bulk, prod_bvqa, vn_bulk_3.0.41
    • cp_1, bvpage1
    • co_hasquestionsanswers, tq_4
    • loc_en_US, sid_90-11975-00, prod, sort_[SortEntry(order=LAST_APPROVED_ANSWER_SUBMISSION_TIME, direction=DESCENDING)]
    • clientName_mrbeer
    • bvseo_sdk, p_sdk, 3.2.1
    • CLOUD, getContent, 245.89ms
    • QUESTIONS, PRODUCT