

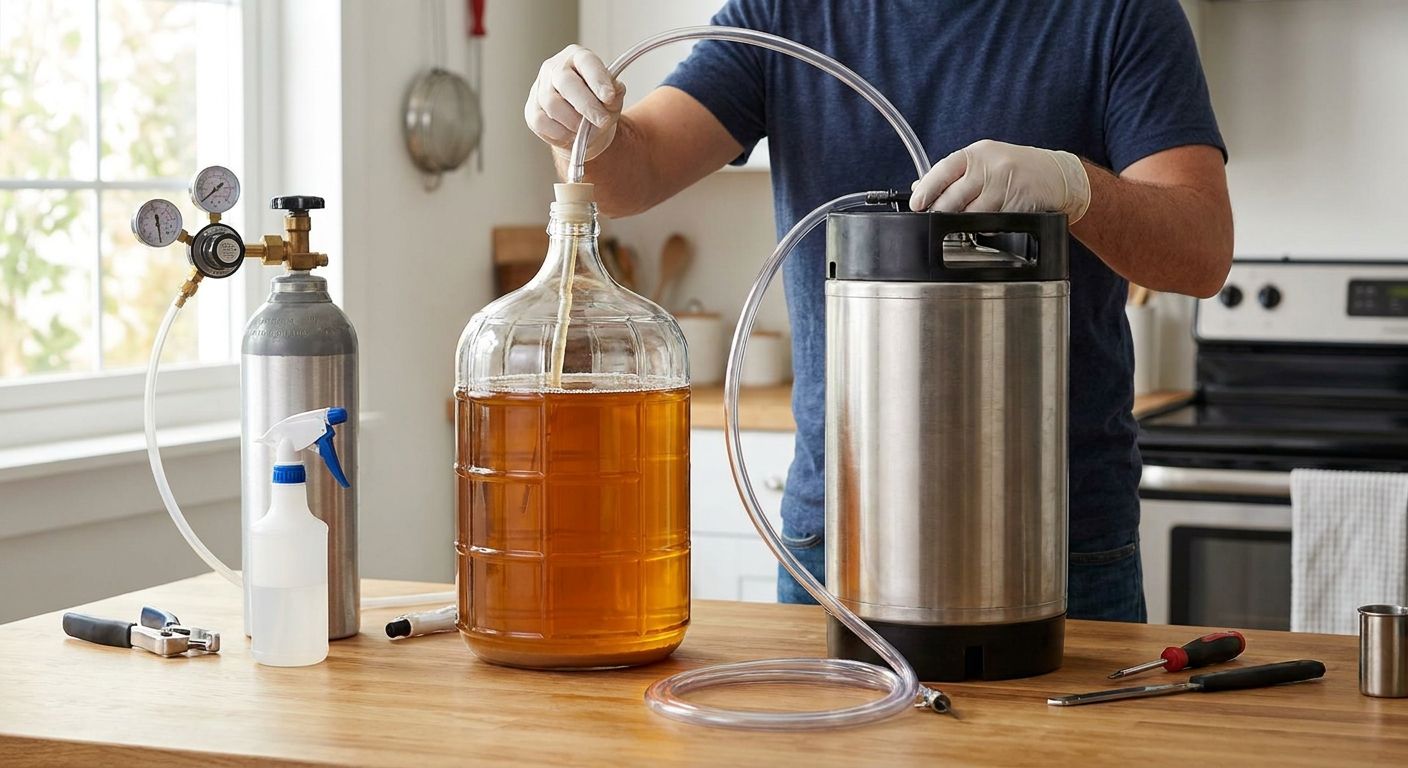
Kegging your homebrew for the first time trades bottle-by-bottle capping for one sealed vessel, a CO2 tank, and a tap you control. It's a bigger upfront setup than bottling, but once it's dialed in, carbonating and dispensing a batch takes minutes instead of an evening at the capper.
- Kegging homebrew replaces bottle conditioning with a sealed keg and CO2, cutting weeks of wait to days.
- A clean, leak-free seal on the lid and posts matters more than any other single step in 2026 kegging setups.
- Force carbonating at roughly 10-12 psi and 38°F for 1-2 weeks is the standard starting point most homebrewers use.
- No-rinse cleanser handles sanitation for both fermenters and kegs without an extra rinse step.
- Most first-time kegging problems trace back to oxygen exposure or a bad O-ring, not the beer itself.
Why this matters
Bottling works fine for small batches, and it's how most people start with Mr. Beer kits. But bottling means washing, filling, and capping every single bottle, then waiting for natural carbonation to finish in each one separately.
Kegging homebrew moves all of that into one vessel. You rack the whole batch once, seal it, and either force-carbonate with CO2 or let it prime naturally under pressure. For anyone brewing regularly in 2026, that's the difference between an hour of bottling drudgery and five minutes hooking up a gas line.
The tradeoff is cost and space: a keg, CO2 tank, regulator, and some way to keep it cold add real equipment to your setup. If you're not ready for that jump yet, the 740ml Deluxe Bottling System is still the simpler path for most home brewers working with smaller batches.
What you'll need
- A 5-gallon corny keg (ball-lock or pin-lock), cleaned and inspected for a working lid gasket
- A CO2 tank and a dual-gauge regulator
- Gas and liquid quick-disconnects with beer line and gas line tubing
- A way to keep the keg cold: a kegerator, keezer, or a picnic tap in an ice bath
- No-rinse cleanser for sanitizing everything that touches the beer
- An auto-siphon or racking cane and tubing to transfer beer without splashing
- About 30-45 minutes of hands-on time, plus 1-2 weeks for carbonation and conditioning
The steps
1. Clean and sanitize everything first
This is the step people rush, and it's the one that ruins the most batches. Every surface the beer touches after fermentation, including the keg interior, lid, posts, and tubing, needs a full clean followed by sanitizing. Run no-rinse cleanser through the keg and lines, then let them air dry or sanitize immediately before racking. Skipping this step is the single most common reason a first kegged batch turns sour or funky.
2. Purge oxygen from the keg
Once the keg is clean, purge it with CO2 before adding beer. Attach the gas line, crack the pressure relief valve, and let CO2 push the air out for a few seconds. Oxygen picked up during transfer is the main cause of stale, cardboard-like flavors showing up weeks later, so this step protects flavor more than almost anything else you'll do.
3. Rack the beer off the fermenter
Transfer beer from the fermenter into the keg using an auto-siphon or racking cane, running the tube to the bottom of the keg to minimize splashing. Splashing at this stage reintroduces the oxygen you just purged out. Go slow and keep the end of the tube submerged as the keg fills.
4. Seal the lid and check for leaks
Seat the keg lid, lock it in place, and pressurize with a short burst of CO2. Spray a mix of water and a drop of dish soap around the lid gasket and posts; bubbles mean a leak. A common mistake here is reusing an old lid O-ring that's cracked or flattened, which never seals no matter how hard you tighten the lid.
5. Choose how you'll carbonate
You have two options: force carbonation with CO2 pressure, or natural carbonation using priming sugar sealed under pressure, similar to how carbonation drops work in bottles. Force carbonating at roughly 10-12 psi and 38°F for 1-2 weeks is the standard starting point most homebrewers use in 2026, and it's the faster, more predictable route for a first keg.
6. Chill and let it settle
Cold beer absorbs CO2 far better than warm beer, so get the keg into a fridge or ice bath before you start carbonating. Give it a few days undisturbed after carbonation finishes so any remaining sediment settles to the bottom instead of ending up in your glass.
7. Pour your first pint and dial in pressure
Connect your beer line, crack the tap, and pour. If you get mostly foam, drop your serving pressure and check your line length; a longer line adds resistance and tames an overly foamy pour. Expect to adjust pressure once or twice before the pour looks right.
“If the pour comes out all foam, the fix is almost always pressure or line length, not the beer.”
Troubleshooting
- Foamy, gushing pour: Serving pressure is too high, the beer is too warm, or the beer line is too short. Chill the keg fully and add line length before touching the recipe.
- Flat beer after carbonating: Check every connection for leaks with the soap test, and confirm the CO2 tank still has pressure. Low or leaking gas is the usual culprit, not a bad batch.
- Off or sour flavors: Almost always traces back to incomplete sanitizing or oxygen exposure during transfer. Revisit step 1 and step 3 on your next batch.
- Keg won't hold pressure: A worn lid O-ring or a stuck poppet valve on the posts is the most common cause. Both are cheap, common replacement parts.
- Slow or weak pour: Usually a kinked line or serving pressure set too low. Straighten the line first, then bump pressure slightly.
Tools and resources
- No-rinse cleanser for cleaning and sanitizing kegs, fermenters, and tubing without a rinse step
- Carbonation drops if you're comparing natural carbonation methods against force carbonating in a keg
- 740ml Deluxe Bottling System if you decide to split a batch between bottles and a keg, or you're not ready to switch over fully
- Step-by-step Mr. Beer kit instructions for the brewing and fermentation steps that happen before kegging even starts
What to do next
Kegging only matters once fermentation is actually finished. Before you rack anything into a keg, confirm your beer has hit final gravity and settled out, since transferring too early carries yeast and unfinished sugars straight into your keg. Read through the fermentation and instruction basics first, then come back to this guide when it's time to rack.
FAQ
How long does it take to carbonate homebrew in a keg?
Force carbonating at roughly 10-12 psi and 38°F typically takes 1-2 weeks for a full, stable carbonation level. Some brewers speed this up by shaking or rocking the keg under pressure, though the slower method gives more even results.
Do I need a kegerator to keg homebrew?
No, a kegerator is convenient but not required. A CO2 tank, regulator, and a keg kept cold in a standard refrigerator or ice bath with a picnic tap will work for a first setup in 2026.
Is kegging better than bottling for beginners?
Kegging saves time on carbonation and packaging once it's set up, but it requires more upfront equipment and space than bottling. Many beginners start with bottling, like Mr. Beer's bottling system, and move to kegging once they're brewing regularly.
Why does my kegged beer come out all foam?
Foamy pours almost always come from serving pressure that's too high, beer that isn't cold enough, or a beer line that's too short. Lowering pressure and lengthening the line usually fixes it within one or two adjustments.
Can I use priming sugar in a keg instead of CO2?
Yes, natural carbonation with priming sugar works in a sealed keg the same way it works in bottles, just on a larger scale. It takes longer than force carbonating and is less precise about the final carbonation level.
How do I know if my keg has a leak?
Spray a mix of water and a small amount of dish soap around the lid, posts, and connections after pressurizing the keg. Bubbles forming at any point mean a leak, usually from a worn O-ring or a loose fitting.
What's the most common mistake first-time keggers make?
Skipping a full clean and sanitize on the keg and lines before transferring beer causes more spoiled batches than any other single mistake. Oxygen exposure during the transfer itself is the second most common issue.
One last thing
The part first-time keggers underestimate isn't the CO2 math, it's the lid gasket. A tired O-ring on a used keg will leak pressure no matter how carefully you dial in psi, and it's an easy thing to overlook when you're focused on carbonation charts. Check it before your first batch goes in, not after your third flat pour.


