

The Brew Times Homebrewing Blog

Mr. B's IPA Quick Pickles
It’s HOT and we are deep in the pit of Summer down here in Arizona. We are staying cool and hydrated with a few “old faithful” remedies… Lots of water, Cold beer, and cold beer pickles! Yes, we’re slightly bloated, but a 5-minute walk outside in an environment similar to the surface of the sun sweats it out of you pretty quickly. Jokes aside, I figured it might be a good time to share this delicious, beer-infused pickle recipe with you! If you love pickles and you love beer, then you must try these puppies. Not only are these tasty but they are much quicker and easier to make than traditional pickles. This recipe uses our “Long play IPA” but feel free to switch that out with an IPA of your choice! Now, let's crack open a cold and make some pickles! What You Need: 1 LB Kirby pickles 12 oz Long Play IPA or other IPA ¼ cup purified water 2 cups Apple Cider vinegar 1 cup sugar 1.5 tablespoon Kosher salt .25 teaspoons of black peppercorns .25 teaspoons Yellow Mustard seed .25 teaspoons Black Mustard seed 2 cloves of smashed garlic (Use more if you really love garlic) .5 teaspoon red pepper flakes 1 sliced jalapeno (remove the seeds if you are sensitive to spice) Several (4-6) Sterilized wide mouth mason jars Sterilized Mason jar lids OPTIONAL: One Fresno or Chipotle pepper thinly sliced Instructions: Wash and dry the cucumbers. Combine the water, beer, vinegar, salt, and sugar in a small pot and bring to simmer. Stir to dissolve sugar and salt and let cool down completely. This step is very important not to rush! In your sterilized mason jars, arrange the cucumbers and the sliced peppers, and add the peppercorns, mustard seed, garlic, and chili flakes. Fill the jars with the cooled-down pickling brine and make sure the pickles are submerged, if you happen to own some pickle weights, now is a good time to use them. Close the lids and store them refrigerated. Turn jars upside down and back up every day. Pickles should be ready in about 7 days. There you have it! Beer pickles! I hope you enjoyed this recipe and if you make it, please let us know in the comments what you think! I love hearing your suggestions for what kinds of beer-infused recipes you would like to see here on the blog, so don’t be shy. Until next time, Cheers! “Chomp, chomp”
Read moreThe Brew Times Homebrewing Blog
Brewing Tools Every Mr. Beer Brewer Needs
If you are looking to really crush your brewing process and make the best quality beer you can every single time, then there are a few essential tools we think every homebrewer needs. These tools will help make your brewing day flow a little better and could even help you make better beer. The tool I wanted to discuss is a hydrometer. This is useful as it will help you calculate the ABV of your brew and will also let you know when your beer is done fermenting. You will take an OG and an FG reading of your beer. The formula to get ABV is FG-OG*131.25. The second part of the hydrometer is that when your FG is the same reading 2 days in a row, then your beer is done fermenting. So it’s a great way to make sure your beer is done and bottle it as quickly as you can. The second tool that is important is a brewing thermometer. We sell some on the website that you can stick to your fermenter and they will tell you exactly what the temperature is of your brew. This is key to help prevent off-flavors and to make sure your beer is in the proper zone. The third tool that is very useful is a bottling want. Filling bottles can be a pain sometimes. So adding a bottling wand to your brewing tools is a great item to help speed up the bottling day. I also find using the wand to be useful in making sure that each bottle is filled up evenly. Related to bottling, I do think that everyone should use carbonation drops. They make bottling even more simple. You just drop in the right amount of drops for your bottle size and fill it on up. Another tool that I like to use personally is a funnel. Our Mr. Beer fermenters have an opening in the top and I don’t have that steady of hands so I have been known to spill wort all over the place. So using a funnel helps me make sure that it all goes into the fermenter. If you are going to use a funnel make sure you sanitize it beforehand. The last tool or item I will mention is an Oxygen brewery wash. This is not a sanitizer but is used after you brew. This is great to help make sure your brewing equipment and bottles stay clean and are good to keep using well into the future. A few other items I think that is always good to have on hand are some extract packets of yeast and some No-Rinse cleaners. You never know what can happen during a brew day so having a few extra of these on hand is always good as a just in case measure. Cheers, Robert
Read more
Brew Now Enjoy for the 4th of July
One awesome thing about homebrewing is brewing beer and sharing it with friends and family during celebrations. There is no better time to do that than during holidays and celebrations. The 4th of July is right around the corner, so if you want to brew up some new batches, you need to get to brewing now to enjoy it for the 4th. So, we picked some of our favorite recipes that we like to drink during this amazing holiday. 1776 American Pale Ale - Brew up this classic style brew reminiscent of the beers that were available back in 1776. Celebrate America in the form of a beer! Patriot’s Pride American Lager - America, the land of the free and the home of the grains. Amber waves and resinous cones, plus a little yeast and water from the purple mountainous majesty all work together in harmony to create bountiful nectar. Share some great grains with your kith and kin this holiday. It's what the American dream is all about. Endurance Cold IPA - Looking to take an expedition into the unknown? Then this Cold IPA is for you. Brew with lager yeast at ale temperatures creates a complex flavor that will leave your pallet asking for more. Feating slight bitterness but most juicy hop notes this brew is perfect for those who don't like heavy-hitting IPAs. This brew is surprisingly refreshing and easy to drink. Just be careful, or you too may find yourself at the bottom ocean Slipper Socks Double IPA - What’s better than slipper socks? Nothing really, but we found a way to make them even better. Put on your best pair of slipper socks and enjoy this amazing IPA. We wanted to clone one of our favorite beers from the Northeast, Heady Topper. If you have that beer then understand why we did it, if you have not then you need to brew this. Full of hop flavor and aroma this beer will blow the slipper socks right off your feet. If you are going to brew an IPA, then this is the IPA you need to brew. On the Mountain Pop Cream Ale - Well…. Sometimes we get a little crazy and that is what we did here. We heard these odd rumors about brewing beer with soda instead of water. YES, soda, sounds crazy right? We thought so too but we just had to see for ourselves. The result of this crazy concoction was absolutely magical! The beer is smooth and easy-drinking, but you get this kind of tart flavor from the soda. It’s hard to describe but it's incredibly refreshing and super crushable. If you're looking for something out of the box to brew, this is it! It will surprise you and anyone you share it with. Maibock is Your Bock - This bock is your bock, this bock is maibock, from the malty flavors to the hoppy aroma. From the Little Brown Keg into your bottles, this bock was made for you and me. As I went brewing with that hopped malt extract, I saw above me those empty bottles and saw below me that liquid gold. This bock is your bock, this bock is maibock. Day After Day IPA - I remember finding out about this beer. Every day my mind is all around beer. Looking out from my brewing room, day after day. Bring it home, better make it soon, this beer is for you. Founder’d in the belief that beer should be enjoyed All Day, we’ve developed a recipe that doesn’t take all day to make. It is a smorgasbord of malts and hops with a clean finish. Now you can make a perfect replica of one of the most delicious IPA’s - ever. It’s Bad, tell everyone it’s yours. Watermelon Wheat - This thirst-quenching beer starts with the base of a Bavarian Weissbier, but then adds fresh watermelon during secondary fermentation. This end product results in a refreshingly fruity wheat beer with a soft watermelon flavor and aroma. Dad’s Favorite Cream Ale - Give Dad a big frosty reward for all his hard work! Evenly balanced, pale and light bodied, this classic Cream Ale is just what he needs to extinguish that powerful thirst after working up a serious sweat out in the yard. Wild American Wheat - Combining the flavors of Bavarian Wheat and Classic American, this beer has the best of both worlds. Balanced flavor with a fruity finish, just enough of everything but not too much of anything. If you happen to brew one of these recipes make sure to take some pictures during the 4th of you enjoying your homebrew and celebrating the greatest day of the year! Cheers, Robert
Read moreHow to increase the ABV in your homebrew?
Everyone is always looking for a way to get more bang for their buck. So kicking up the ABV in your homebrew is a great way to drink less beer and get your buzz on. So we got some great items you can use during brew day to increase the abv of your beer. There are a few things that we should point out before we get started. We always recommend brewing our refills or recipes as is, especially if you are a new brewer! You want to make sure to follow the directions and get the processes down. If you don’t have the brewing process down, then when you start wanting to experiment you might overlook some steps or make a mistake or two and get a bad brew. No one wants that. It is also important to note that you should always chase flavor not ABV. Adding different adjuncts and fermentables will change the flavor of the beer you are brewing. So, if you decide to dump a bag of sugar into your beer, most likely it won’t turn out that well. Okay, enough of all that let's dive into what you can use to increase the ABV of your beer. The first one is obvious and tends to be what we recommend. Malt Extract Adding more malt extract either hopped, liquid, or dry will increase the ABV of your beer and improve the flavor as well. This is the best option to add more ABV to your beer. We offer deluxe refills on the website which pairs a standard refill with two LMEs to help boost up the flavor and ABV. We also offer LME, DME, and HMEs as single items that you can buy to add to anything you are brewing or to create your own recipe. The next few items that you can add are ones that can be found in your house. We would recommend adding 1 cup or 2 cups max of these to your beer. Depending on what you are using it will add about 1%-1.5% ABV per cup to the final ABV. First, we will start will Sugar. You can add table sugar, corn sugar, or brown sugar. You want to be careful with the amount of sugar you're adding as we mentioned earlier that can create some odd flavors. When adding these you would add them to your 4 cups of water that you are bringing to a boil and mix it up until the sugar is dissolved. Also, it is a good idea to pair the type of sugar you are using with the type of beer you are brewing. Brown sugar would go great with a stout or an amber beer, whereas corn sugar would be good for a light ale or lager. One thing to note about the sugar you cannot use sugar substitutes, they will not ferment. So things like Stevia or Splenda won't work. Okay now, let’s get into syrups and other liquids. You can add things like Honey, Maple Syrup, Agave Nectar, and Corn Syrup. Again, these will add about 1%-1.5% ABV per cup to your beer. When adding these you would add them to your 4 cups of water that you are bringing to a boil and mix it up until the sugar is dissolved. Also, it is a good idea to pair the type of sugar you are using with the type of beer you brewing. If you ever have any questions or are unsure what to add just shoot an email and we can get back to you and give you some advice on what we would recommend and what would go with what you're brewing.
Read moreWhat is the difference between LME & DME?
If you are looking to create your own masterpiece or just dive into brewing some recipes you are going to notice two main adjusts. Those are DME & LME. Well, we break down what their difference is and how to best use them. When talking about DME & LME we are only really talking about one main difference between them. One is dry and one is liquid. Dry Malt Extract and Liquid Malt Extract. Besides the name and substance difference the only other differences are how you use them and the slight impact they have on your beer. Let's talk about how you use these first. LME is pretty simple to use, it’s just like brewing with your Hopped Malt Extract but it offers a little more versatility since it is unhoped. You are able to do a hop boil with LME. You just want to make sure that it is fully mixed before you do your boil and note that boiling LME will cause it to darken a little bit. When using a DME there are a few things you will want to know. The first is that if you dump the DME into boiling water it will get gummy and clump together, so you always want to add your DME as your water is coming up to a boil to help prevent this. You will also want to add a little at a time, just dumping the whole bag in can create some issues when trying to mix it up. Also, if you are using DME for your hop boil, you will want to make sure that you are waiting for the hot break before you add in your hops. You will want to keep mixing the DME as it boils to keep the foam from rising too high and spilling over your pot. Once you hit the hot break you will see the foam subside and it will just look like a regular boil. So, make sure to pay attention when doing this, if you have ever had a boilover, then you know that it is a sticky mess that is a pain to clean! Pro Tip for you, if you keep a spray bottle of clean water handy you can spray the foam when it gets too high and it will help keep it down. Color affect, using DME will usually help preserve the lighter color in your beer. So if you are wanting to brew a light lager, pilsner, pale ale, etc, you may want to go with a DME in this instance. LME is much easier to use, so if you are new to brewing or just want to get in a quick easy brew go with the LME. As far as flavor goes there have been some that said LME creates a more pleasant flavor in your beer vs DME. DME is more concentrated, so it can kick up your ABV with less. In the end, it just comes down to your personal preference and what you are brewing and the process that you feel like doing, or the recipe you want to create.
Read more
5 Beers to Try This Summer
Looking for some “new” brews to cool down with this Summer? If so, start here! Below, you find 5 great commercial summer beers AND if you enjoy them, we’ve also included a Mr. Beer recipe that is similar for you to brew all year long! 1. LEINENKUGEL’S SUMMER SHANDY “A true summertime classic, you can’t go wrong with a shandy. Traditionally brewed using a blend of beer and lemonade, they make for an option that’s as balanced, flavorful, and thirst-quenching as drinks come. Of all the bottled premixes available on the market, Leinenkugel’s offering is easily the most well-known. And it’s for good reason — you’ll find the mix of Weiss-style wheat beer and natural lemonade to be a welcome respite after a long day spent out in the sun.” If you like that try brewing our Summertime Shanty 2. LAGUNITAS DAYTIME IPA “A Session beer, great for warmer weather because the low alcohol content means you can throw back a few without catching too much of a buzz. And while most of the choices on the market are pretty bland experiences, Lagunitas’ Daytime IPA is one option that actually manages to bring the flavor, too. Pouring a pale yellow in color, it’s malty and simple with a high hoppy profile, all the while clocking in at just 98 calories a can.” If you like that then you need to brew our Day After Day IPA 3. 21ST AMENDMENT HELL OR HIGH WATERMELON WHEAT “What says summer more than a juicy bite taken from a fresh watermelon? 21st Amendment decided to push the envelope and brew a wheat beer using the season’s flavorful fruit. Before you write it off as craft candy in a can, trust us when we say that Hell or High Watermelon Wheat is subtler than you’d expect. Of course, the beer is undoubtedly on the sweeter side, but it’s balanced out by a bready body and just a touch of bitterness.” If you are looking to quench your thirst this summer then brew our Watermelon Wheat 4. ALLAGASH WHITE “Allagash White is quite the cult favorite within the world of craft beer, having garnered itself a sizeable following since it launched back in 1995. Although it’s an enjoyable brew almost any time of year, we especially like it during the summer because of its crispness and appley-pear taste. It’s worth noting that before sipping on this Belgian-style witbier, you should give the yeast a good rousing to stir up the sediment and soften the mouthfeel. Take our word for it — doing so makes a world of difference.” If you enjoy that beer then you need to brew our Belgian Blanc Witbier 5. SIERRA NEVADA SUMMER BREAK “At 4.6% ABV and 30 IBU, Summer Break is already an impressively sessionable brew compared to most beers, and it’s made even more so when you consider that it’s a hazy IPA. Heaped with hoppy character, Sierra Nevada’s offering tastes just as full-bodied and flavorful as any of its traditional IPA alternatives, albeit in a much more manageable format.” This is a must brew our Royal Juice NEIPA If you try any of these, let us know what you think about them in the comments! Cheers! Ashley
Read moreHow to Ferment Your Homebrew in 7 Days?
If you are like me the hardest part about homebrewing is waiting for the beer to ferment. It can seem like ages before you get to bottle and then actually drink it! So, I thought it would be a good idea to break down how you can ferment your beer in 7 days. The key to doing this is to have your brewing process dialed in to be exact and you need some extra brewing tools. First, you need to make sure you are using clean and appropriate water for homebrewing. If you are using tap water for example that will have some extra chemicals in it. Those could cause some slight off-flavors in your brew which may take a little longer than 7 days to ferment out. Next, you need to make sure your temperature is on point. Now, this does range depending on the yeast you are using. For example, with our standard Mr. Beer yeast, we have found that the ideal range is right around 72 degrees. It does well a little warm and ferments fast. So check the recipe you are brewing, what yeast it is, and make sure you can hold that temperature consistently during the brewing process. Regarding temperature, you also need to make sure that your wort is at the proper temperature as well before you pitch your yeast. This will help the yeast propagate and fermenter better. Another factor that will help is that you need to make sure all of your brewing equipment is thoroughly cleaned and sanitized. So if you have all the steps in the brewing process down to a science then you need something to check your brew so you know when it is done. There are a few things you can use for this. I have some people use the Tilt which connects to an app on your phone to let you know once your beer is done. But if you don’t feel like spending the money you can also use a good old fashion Hydrometer. When you first make your wort and before you pitch your yeast you will take a reading and this is your original gravity. As the yeast eats the sugars in your wort the gravity will decrease. The way to know that your beer is done fermenting is that your gravity will not change within a 24 hour period. So for example, if you want to ferment for 7 days, you will take a gravity reading on day 6 and if that reading is the same on day 7 then your beer is done and ready to bottle. With the proper equipment and a dialed-in brewing process, you can ferment a beer in 7 days. A little side tip for you. If you brew your beer in 7 days and you try one after carbonating and conditing and it tastes a little off, then it needs to condition longer. If you have any off-flavors in your brew we recommend letting the bottles sit at room temperature for an additional 7 days and then try one and see how it tastes. Repeat this process until the off-flavor in your beer is gone. Cheers Robert
Read moreHow to improve head retention in your homebrew?
I think one of the most disappointing things that can happen in homebrewing besides getting an infected batch of beer, is poor head retention. We have all had that feeling when we pour our beer and nothing, no foamy head. I thought it would be useful to break down some easy ways you can help improve your head retention. The first thing you want to do is to make sure that all your equipment and bottles are thoroughly clean. No gunk, dust, or anything inside of them. I would suggest cleaning your equipment and bottles with a brewing cleaner quite often to help keep everything nice. You also want to make sure you have good bottles and caps. If you are using our PET bottles they do last a long time, but we do recommend replacing the caps every few months depending on how often you are brewing. If you are noticing that your carbonation and head retention are starting to suffer might be time for some new caps. Now onto glassware. It is critical that you are using a clean glass that has no dust, or oily soap residue in it. Both of those factors can have an impact on head retention. You also want to make sure that you are using the proper glass for your beer style. There are all different types of glasses out there and they can impact your head retention as well as your aroma. Another factor that will impact this is the proper pouring of the beer. Tilt the glass at a 45-degree angle and then when the glass is about two-thirds full level the glass. If you want to add some items to your brew to help with head retention you can also do that. You can steep some carapils malt for 30 minutes at 145-155 and this will help improve the head retention of your beer. It is also critical to make sure that you are adding the proper amount of priming sugar to your beer and that your carbonation and conditioning temperatures are in the ideal range for your recipe. That wraps this up and those are all the tips you can use to help improve your head retention in your homebrew. Cheers, Robert
Read more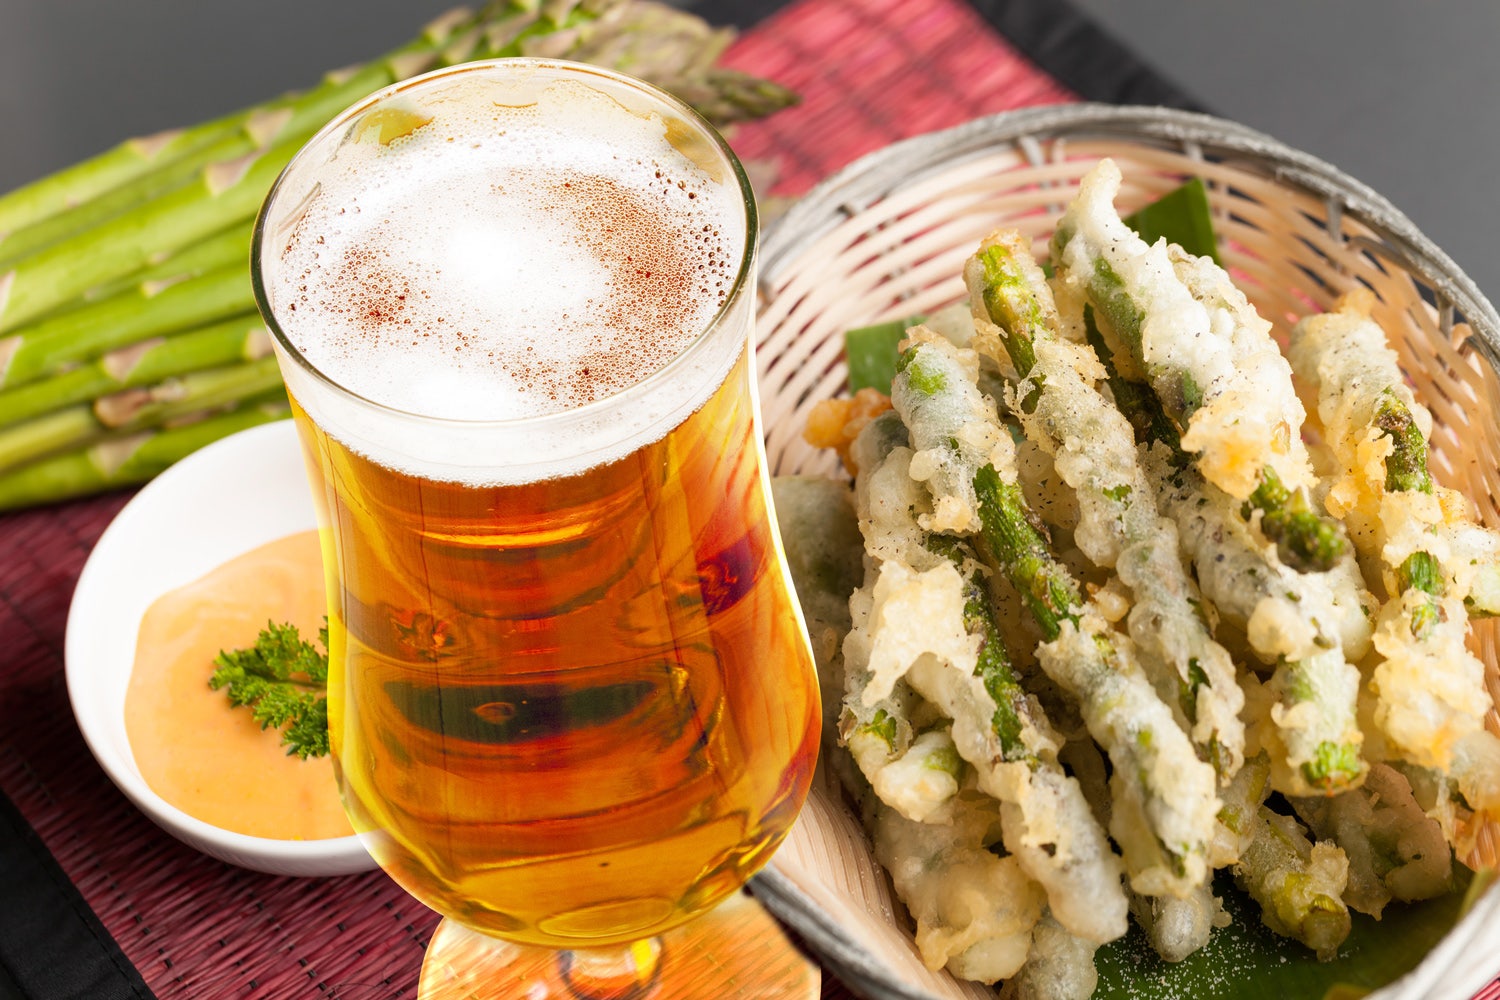
Beer Battered Asparagus
I can’t believe it! It is nearly Spring already! When I think of warmer months on the horizon, I think of cold beer, springtime activities with the family, and great food! Speaking of great food, if you have a hard time finding reasons to eat your veggies, this beer-battered asparagus recipe might just change your mind. Paired with a tangy and refreshing dipping sauce, you might not have to bribe anyone to eat these! What you need: 1 bunch of medium-sized asparagus with the ends trimmed 2 cups of buttermilk 2 eggs separated ¾ cup beer (Northwest pale ale or other Pale ale beer) ¾ cup All-purpose flour ¾ cup white cornmeal 1 teaspoon salt ½ teaspoon cayenne pepper ½ teaspoon black pepper 4 cups peanut oil Sea salt Dipping Sauce: 1 cup mayonnaise 1/3 cup lemon juice ½ tablespoon Dijon mustard Zest of one lemon 4 tablespoons minced garlic 1 tablespoon tarragon leaves, minced ¼ teaspoon black pepper 1/8 teaspoon cayenne pepper Salt How to make it: In a shallow pan, soak asparagus in buttermilk for 12 to 24 hours. After, remove asparagus from buttermilk, but do not rinse. Set aside. In a large bowl, combine the egg yolks, beer, flour, cornmeal, salt, cayenne pepper, and black pepper. In a large deep pot, heat peanut oil to 350 degrees F. Meanwhile, in a large clean bowl with an electric mixer, beat egg whites to stiff peaks. Gently fold beaten egg whites into the batter mixture. Dip spears, 1 at a time into batter, then carefully lay in oil. Do not overcrowd the pan or they will become soggy. Fry in batches, if necessary. Fry for 2 to 3 minutes, turning the spears with tongs to ensure even cooking. Drain on a paper towel-lined plate. Sprinkle with sea salt, to taste. Serve immediately with cold dipping sauce. How to make the dipping sauce: In a food processor, combine all ingredients and blend well. Refrigerate for 1 hour before serving. Now all you must do is pour a cold one and sit back and enjoy some delicious eats! I hope you enjoy this recipe and if you make it, please let us know what you thought in the comments! Cheers! Ashley
Read moreDifferent ways to use hops to jazz up you’re brew day
Hops are pretty awesome, and they can add all kinds of amazing flavors to your brew. If you're new to brewing, you might be wondering well how can I take hops and jazz up my beer? Well, we got some basics techniques for you that can help you utilize hops and create your own unique brew. The first thing you need to consider is the choice of hops you want to use. Hops are categorized by what is called alpha acid. Alpha acids are the principal component in lupulin, which is the resin of the hop cone. This is the main agent that imparts bitter flavors into your beer. So if you are using a high alpha acid hop you will be able to get more bitterness in your beer than a lower alpha acid hop. Some high alpha acid hops are Chinook, Citra, or Warrior just to name a few. If you are picking a hop that has a lower alpha acid those tend to be used more for flavoring and aroma than bitterness. But at the end of the day, it's your brew, so you can use whatever hop you want. The main component that will affect how the hops impact your beer is how you use them. The most common way to use hops is to boil them. This is how you get bitterness into your brew. So a few things to consider when doing your hop boil. The size of your boil will impact the amount of bitterness you can extract from your hops. If your boil is closer to your actual finished batch size, then you can get more bitterness out of your brew. If you are doing a very small boil volume, then you might need to use more hops to get more bitterness out of your brew. Now the second part about boiling hops is the temperature and the duration. So the longer you do a boil you will extract more bitterness out of your brew. A shorter boil will result in less bitterness. Doing a hop schedule will also bring out different flavors and traits of the hops. For example, you boil one hop for 45 minutes. 20 minutes into that boil you add another hop, then 35 minutes in you add another hop. One way to stop boiling is to chill the wort quickly So once you are done with your hop boil if your remains between 185-210 degrees the hops will still impact bitterness into your brew. This is called high isomerization. So once you are done with your hop boil try and continue on with your brewing process as soon as you can to reduce getting extra bitterness out of your brew. The last main thing you can do with hops is called dry hopping. This is done after the beer has started to ferment. Now doing this does hardly adds any bitterness to your brew. This is more to add aromas and flavors. Doing late-stage dry hopping can have a profound impact on the smell of your beer. Cheers, Robert
Read more
How to Make Beer
Brewing beer at home is simpler than you think. If you can follow simple instructions and have common kitchen items, plus a Mr. Beer Kit you easily brew up a batch of the best-tasting beer your palate has ever experienced. These steps outlined are for brewing our basic ingredients that come with our Mr. Beer Kits. Step 1: Prepare Gather your brewing equipment. You'll need: Brewing pot for use on your stove (1-gallon capacity) 2-Galon fermenter Purified refrigerated water Mr. Beer No-rinse Sanitizer Whisk Stir Spoon Mr. Beer Hopped Malt extract Mr. Beer Brewing yeast (found under the lid of your hopped malt extract) Mr. Beer Booster or LME (optional) Bottles Carb Drops or sugar for bottling Make sure to check out our Mr. Beer Complete Brewing Kits. They come with everything you need to get started. All you have to supply are common kitchen items. View Our Beer Kits Step 2: Santize As a rule of thumb, your brewing equipment can never be “too clean”. Sanitizing is one of the most important steps to having a successful brew! Before you begin brewing, fill your fermenter with one gallon of water and add HALF the packet of included “No-rinse cleanser” to the water. Use this solution on all your brewing equipment including the keg, spoons, scissors, and anything else you may be using during the process. Maintain the other half-packet for your bottling process, later. Step 3: Brew 1. Place your pot on the stove with the heat off and add 4 cups of water. If your kit contains Booster packets, add them to the cool water and stir to dissolve. 2. Bring water to a boil. Once boiling, remove the pot from the heat. 3. Open the can of brewing extract and pour it into your pot of hot water. Stir with a sanitized spoon to combine. (If your kit includes LME packets, they will also be added in with the can of brewing extract.) This unfermented mixture of beer is called “wort”. Step 4: Ferment 1. Add cold water to your fermenter to “Line 1”. This is approximately 1-gallon of water. 2. Pour your wort into the fermenter and add more cold water until you reach “line 2” on your fermenter. This will bring your total volume to approximately 2-gallons. 3. Stir with a sanitized whisk and sprinkle in your included packet of yeast. Screw on the lid. Step 5: Bottle After fermentation is complete, typically within two weeks, it's time to bottle your beer. 1. Sanitize your Bottles and caps by mixing the remaining portion of the no-rinse cleaner with one gallon of water in a large bowl. Rinse each bottle with sanitizer and empty the excess back into the bowl. 2. Prime your bottles for carbonation by adding carb drops or sugar to each sanitized bottle. 3. Fill each bottle with beer about an inch from the very top of the bottle and cap each bottle as you go. 4. Once bottled, place your bottles in a warm area (72-75 degrees F) to condition for 2-3 weeks. 5. After conditioning, place your beer in the refrigerator for 24-48 hours That's it! You just made your first batch of beer, congrats! Now sit back and enjoy the fruits of your labor, cheers!
Read moreHow to change the flavor of your beer during bottling?
If you are looking for a simple way to add some unique flavor to your brews, then this episode is for you. Adding different adjuncts during bottling can alter the taste of your beer. Some of these will take the place of your carbonation drops others you will use with them. We wanted to highlight some of our favorite ones for you to use during the bottling process. Dextrose The first thing I wanted to talk about was dextrose. This would be used instead of carbonation drops or table sugar. The dextrose is an extremely fermentable sugar so it will help boost carbonation in your beer and get that crisp taste. If you are brewing a lager this would be something that could add a different dynamic to it. You will want to use the same amount as you would sugar when bottling. Honey or Maple Syrup Honey and Maple are something that you can use to replace the sugar when bottling. It will add some sweetness and some unique flavor to your beer. Honey tends to pair best with the lighter style beers and maple syrup with the darker ones, but you can mix and match how you like. When using honey or maple syrup when bottling you will want to make sure that you are using a freshly open bottle, you don’t want something that has been sitting around for a while. The ratio for honey or maple syrup to sugar is 1 to 1. So in our 740 bottles we use 2 teaspoons of sugar you would use 2 teaspoons of honey or maple syrup. You just add it right into the bottle then fill it up with beer. Vanilla Extract Most vanilla extract does contain alcohol so there is no need to pasteurize or sanitize it. During bottling time, you will want to add 1-2 teaspoons depending on how much flavor you want from the vanilla. Always make sure to use a sanitized measuring spoon and for this one you will still need to add your priming sugar or carbonation drops. Coffee We have a few recipes that call for adding coffee or expresso when bottling. For this mixture I would do it the same as you would the vanilla, 1-2 teaspoons depending on how strong you want the flavor. If you are using expresso you will want to make sure that it is at least room temperature when adding to your bottles. You can also use cold brew coffee concentrate as well to get those coffee notes out of your beer. This is great for stouts, porters just dark beers in general. We do recommend using the cold brew method as it just has a smoother taste and will pair better with your beer. Whiskey If you want to get really wild with it you can bottle your beer with some whiskey. You will want to add a shot or less to each bottle depending how strong you want the flavors. You do want to be careful though, adding too much booze to your bottle and the yeast will not be able to carbonate, so nothing more than a shot per bottle at most. Monin Flavor Syrup Comes in a ton of different flavors and they can all be found on Amazon. They have sugar-free and sugar sweetened ones. If you are using the sugar-free styles you will need to add your priming sugar just like you normally would. If you are using the ones that are sweetened with sugar, then the ratio would be 1 to 1 just like with the honey and syrup. Just add it to the bottle and then fill it with beer and your good to go. Those are just some of the adjuncts that you can add during bottling to get some unique flavors out of your beer. Depending on how much you add that will alter the impact of that particular flavor and always make sure everything is sanitized. One unique thing about altering flavoring during bottling time is that you can do some testing during this time. You can do half your bottles with honey and the other half with maple syrup to see the difference. This is a really a time where you can get creative.
Read moreWhat household items you can use to sanitize for homebrewing?
The best way to ruin a good brew day is to not have any sanitizer on hand. But what can you do if you make it to that point? Well, we got some common household items you can use if you’re in a pinch. Bleach You can use bleach to sanitize your brewing equipment. The rule of thumb is to use 1 cap full of bleach for every 1 gallon of water. You will want to make sure the bleach is non-scented. Scented bleach can lead to odd smells and flavors in your brew. When using the bleach, you will want to mix up the solution of 1 cap to 1 gallon of water and then sanitize like you normally would. The only difference is that you will want to rinse your fermenter, bottles, and utensils afterward until the smell of bleach is gone. This will help to prevent you from getting some odd smells or flavors in your beer. Oxy Clean Free You will want to mix 1 tablespoon of this into a gallon of water. Again, once you mix this up you will use it the same way that you would normally sanitize. With this one, we would also recommend just giving everything a light rinse once you have covered them in the solution. The Oxy Clean Free has a similar chemical breakdown as our Mr. Beer No-Rinse Cleanser but since it is not Food Grade, we would suggest rinsing it just to be safe. Hydrogen Peroxide Another great substitute is Hydrogen Peroxide. This works very similarly to our No-Rinse Cleanser. You will want to make sure that the grade of peroxide is 3% or higher. This can be found at most drug stores. You don’t need to mix this with water or anything. Just get enough so you can sanitize all of your equipment. You will use this the same exact way that you use our No-rinse cleanser. That covers all the replacement cleaners you can use just in case you don’t have any Mr. Beer No-Rinse Cleanser. If you brew a lot, I suggest stocking up on some of the cleansers, it never hurts to have a few extra. I think the easiest thing to do is just stock up on No-Rinse! Cheers, Robert
Read more