From Idea to Glass: How to Design Your Own Homebrew Recipe
Create Your Own Homebrew Recipe: Brew your Dream Beer!
Want to take the next step and push your brewing abilities to the next level? Designing your own homebrew recipe is a fun, rewarding adventure—and there's nothing quite like cracking open a cold one that you made yourself. Ready to make your dream beer a reality? Let's dive in!
Step 1: Pick your Beer Style
First things first: what kind of beer are you in the mood to create? If you're looking to save time, start with a style you're familiar with, maybe one you've brewed before, and tweak it for a new twist. Look through the Mr. Beer refill section to find your perfect base.
For some more inspiration, the Beer Judge Certification Program (BJCP) style guidelines are your best friend. They give you a complete rundown from flavor profiles to ingredient tips. But, hey don't be afraid to get creative and break the rules!
Step 2: Gather your ingredients
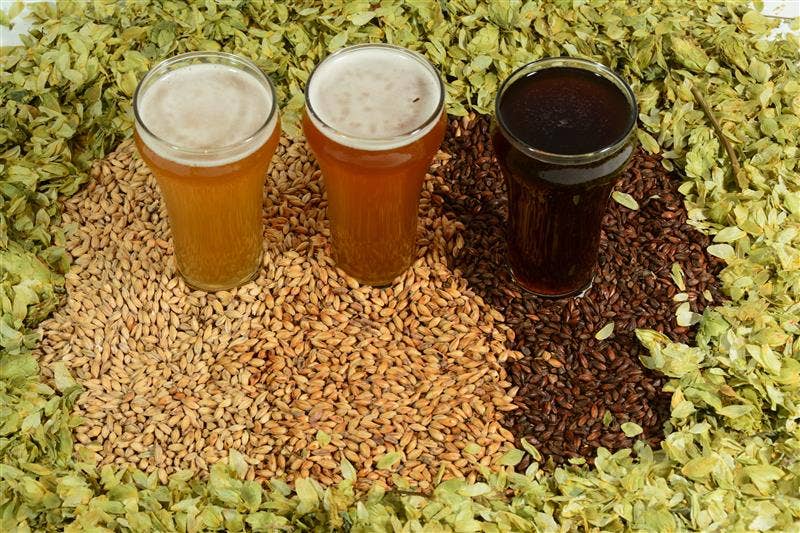
Now that you've got your beer style locked down, it's time to think about the essential ingredients that will bring your beer to life. You're going to need the classic four: malt, hops, yeast, and water. But within each of these categories, there's an ocean of options to explore. Luckily, Mr. Beer has you covered from specialty grains to fresh hops, we have everything you need!
- Malts: This is going to serve as the backbone of your beer. If you're brewing something dark like a porter, then roasted malts with chocolate or coffee flavors are calling your name! Think of malts as the flavor palette that sets the stage for everything else.
- Hops: These little guys are going to add bitterness, flavor, and that signature aroma that makes beer so irresistible. The hops you choose will depend on your style, for a juicy IPA reach for something like Cascade or Citra for the citrusy notes.
- Yeast: The magic happens here (no, seriously!). Yeast ferments the sugars in your wort and turns it into alcohol! Different strains will produce different flavors and aromas.
Step 3: Put It All Together
With your ingredients in hand, it's time to design your recipe. A great place to start is by using a beer recipe calculator that can help you figure out things like your beer's alcohol content (ABV), bitterness level (IBUs), and color (SRM). Don't be afraid of the more technical aspects—it's part of the fun!
Almost every Mr. Beer recipe comes to life thanks to the Brewer's Friend Beer Recipe Calculator and the creative genius of our Brewmasters. That's how we craft the delicious recipes you know and love!
Step 4: Brew It Up!
Now comes the fun part—brewing your beer! As you brew keep your eye on these numbers to make sure your beer turns out just the way you want it!
- Original Gravity (OG): This is how strong your beer will be before fermentation. Typically, the higher the OG, the higher the alcohol content.
- Bitterness (IBUs): The bitterness ratio helps you balance your beer's flavor—think of it as the battle between hops and malt. A super hoppy IPA? High bitterness ratio. A smooth, malty stout? Low bitterness ratio.
- Color (SRM): It's an easy way to match your beer's appearance its style. Keep it simple: if you want light beer, stick to pale malts; if you want something dark, go for the deep toasty ones!
- Final Gravity (FG): This is the last gravity reading after fermentation, showing how much sugar is left and your final alcohol content. As you start out, final gravity isn’t something to stress over—it’s just good to keep notes!
Step 5: Perfect Your Brewing Technique
Once you've got your ingredients and recipe dialed in, it's time to focus on technique! Different beer styles call for different methods, so here are a few key ones to consider:
- Hops: Play with dry hopping, late additions, or bittering hops to get the right aroma and balance.
- Steeping: Instead of mashing, Mr. Beer uses steeping—a simple way to add rich, grainy flavors to your brew without the extra work. Just soak your grains in hot water (155-160°F) for 30 minutes, like making a strong tea for your beer. Easy, flavorful, and no complicated mash required!
- Fermentation & Aging: Keep your yeast happy by fermenting at the right temp, and consider aging for smoother results.
Brewing is part science, part art—so experiment, have fun, and enjoy the process!
Step 6: Taste and Adjust
You're almost there! Now that your beer is brewed and fermented, it's time to taste it. Don't be afraid to take notes on what you love and what you might want to tweak next time. The beauty of homebrewing is that it's a continuous process of trial, error, and improvement. If you love how it turned out, you've just crafted your very own beer recipe! If not, hey there's always next time.
Final Sip
Creating your own beer is a totally rewarding experience, and you don’t have to be a pro to get started. With a little creativity, a few great ingredients, and some good ol’ fashioned trial and error, you’ll soon be sipping on the beer of your dreams. So what are you waiting for? Get brewing, and let your imagination run wild!
Cheers to your next homebrew adventure!
Looking for All the Homebrewing Ingredients You Need?
We’ve got you covered! Mr. Beer offers specialty grains, brewer’s yeast, hops, and malt extract so you can get started brewing your own masterpiece. Check out our full selection of ingredients here, and start making your dream beer today!
Remember, there's no rush—brewing should be fun, not stressful! If creating your own recipe feels overwhelming, just kick back and reorder your favorite Mr.Beer refill. It’s easy, delicious, and always a win!
I use a Brewing calculator to figure out how much of what to add, and times to boil if using hops to add bitterness. There are several but I use the Brewer's Friend free online one.
You can also look at the Mr. Beer recipes and archived recipes to see what their brewers have done to create similar recipes.
I have used Mr. Beer HMEs to make close clones of several commercial beers. You may have to try a few times but it is possible.
I hope this helped.