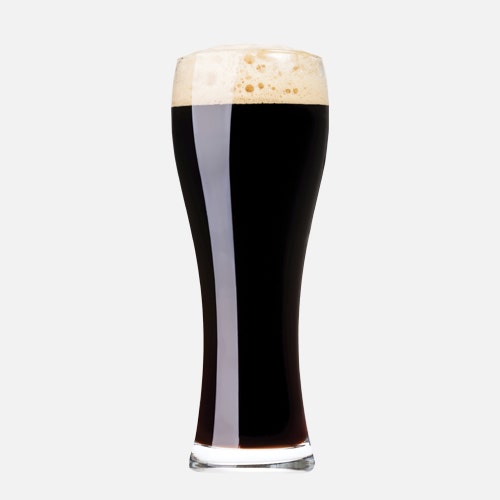
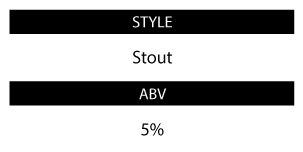
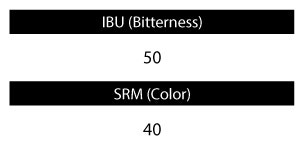
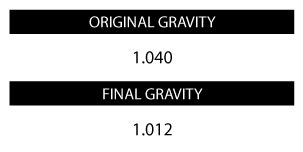
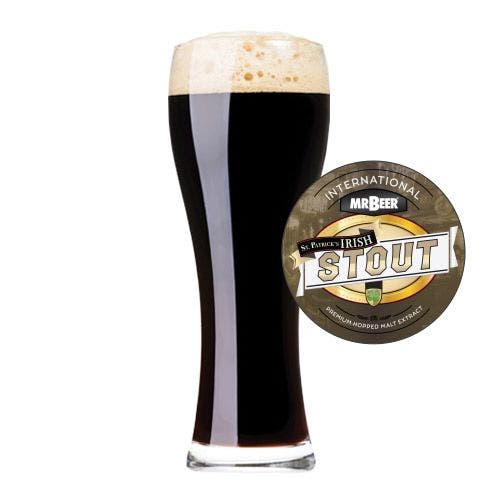
St. Patrick's Irish Stout Standard Refill

St. Patrick's Irish Stout Standard Refill is rated 4.7 out of 5 by 267.
  • y_2024, m_9, d_7, h_6
  • bvseo_bulk, prod_bvrr, vn_bulk_3.0.42
  • cp_1, bvpage1
  • co_hasreviews, tv_113, tr_154
  • loc_en_US, sid_90-11965-00, prod, sort_[SortEntry(order=RELEVANCE, direction=DESCENDING)]
  • clientName_mrbeer
  • bvseo_sdk, p_sdk, 3.2.1
  • CLOUD, getAggregateRating, 210.92ms
  • REVIEWS, PRODUCT
  • If you enjoy drinking Guinness Stout, Murphy's Irish Stout, Smethwick's Irish Ale or Bell's Kalamazoo Stout then this is the Refill for you!
  • Our Refills come with everything that is needed to brew your next batch of great tasting beer. 
  • All of our Refills are done brewing within 10-14 days and designed for brewing 2-gallon batches. 
  • Mr. Beer's brewing extract is formulated and produced by master brewers at Coopers Brewery in Australia using the highest quality, all-natural barley and hops. 
  • Every Mr. Beer Refill comes with Coopers proprietary brewing yeast that performs well in a wide range of temperatures. 
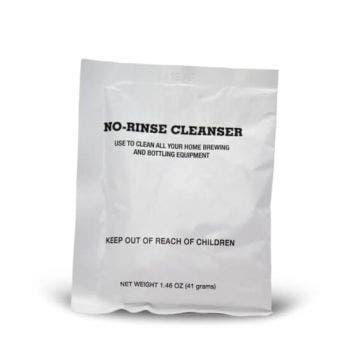
  • With this Refill, you will get our St. Patrick's Irish Stout HME, 2 Bags of BrewMax Booster, 1 packet of No-Rinse Cleanser, and 1 packet of brewing yeast.
$21.95
SKU
90-11965-00
Customize St. Patrick's Irish Stout Standard Refill

* Required Fields

Your Customization
St Patrick's Irish Stout Standard Refill
St. Patrick's Irish Stout Standard Refill

In stock

Subscription details
Wishlist

$21.95

Summary


    STEP 1: Sanitizing

    Cleaning is one of the most important steps in brewing. It kills microscopic bacteria, wild yeast and molds that may cause off-flavors in your beer. Make certain to clean all equipment that comes in contact with your beer by following the directions below:

    1. Fill clean keg with warm water to line mark 1 on the back, then add ½ pack (about 1 tablespoon) of No-Rinse Cleanser and stir until dissolved. Once dissolved, the solution is ready to use. Save the remaining ½ of No-Rinse Cleanser because you will need it for bottling.

    2. Screw on lid and swirl the keg so that the cleaning solution makes contact with the entire interior of the keg, including the underside of the lid. Note that the ventilation notches under the lid may leak solution. Allow to sit for at least 2 minutes and swirl again.

    3. To clean the spigot, open it fully and allow liquid to flow for 5 seconds and then close.

    4. Pour the rest of the solution from the keg into a large bowl. Place your spoon/whisk, can opener and measuring cup into the bowl to keep them cleaned throughout the brewing process. Leave them immersed for at least 2 minutes in cleaning solution prior to using.

    5. After all surfaces have been thoroughly cleaned, do not rinse or dry the keg or utensils. Return lid to top of keg, proceed immediately to brewing.


    STEP 2: BREWING

    Brewing beer is the process of combining a starch source (in this case, a malt brewing extract) with yeast. Once combined, the yeast eats the sugars in the malt, producing alcohol and carbon dioxide (CO2). This process is called fermentation.

    1. Remove the yeast packet from under the lid of the can of brewing extract, then remove the label from the can. Place the unopened can in hot tap water

    2. Using the clean measuring cup, pour 4 cups of water into your 4-quart or larger pot. Add your booster packs slowly while stirring the cool water until dissolved. Bring water to a boil, and then remove pot from heat.

    3. Open the can of brewing extract from the bottom of the can and pour it into the pot. Stir until thoroughly mixed. This mixture is the wort.

    4. Fill the keg with cold water to line mark 1 on the back. The water must be cold (ideally from the refrigerator) with a temperature of 40-55°F/4-12°C. For the best results, we recommend using bottled spring water or filtered tap water. If using any other fermenter this would be approximately 1 gallon of water.

    5. Pour the wort into the keg and then bring the volume of the keg up to line mark 2 by adding more cold water. Mix vigorously with the plastic spoon/ whisk. Be careful to not scratch the inside of the keg, which could create small spaces for bacteria to grow. (If you have a different fermenter top it off with cold water to the 8.5-liter mark).

    6. Sprinkle the entire yeast packet into the keg and then screw on the lid.Do not stir.

    7. Allow your fermenter to sit for 10-14 days.

    Store the fermenter in a cool, dark place between 68-78°F/20-26°C for the yeast to work properly. The ideal temperature range is 70-72°F / 21-22°C. After a few days the foam and activity will subside and your batch will appear to be dormant. However, the yeast is still at work, slowly finishing the fermentation process.


    STEP 3: Bottling & Carbonating

    After 10 days, taste a small sample to determine if the beer is fully fermented and ready to bottle. If it tastes like flat beer, it is ready. If it’s sweet, then it’s not ready. Let it ferment for 4 more days (14 total). At this point it is time to bottle. Do not let it sit in the fermenter for longer than 24 days total.

    1.When your beer is ready to bottle, fill a 1-gallon container with warm water, then add the remaining ½ pack of the No-Rinse Cleanser and stir until dissolved. Once dissolved, it is ready to use.

    2. Distribute the cleaning solution equally among the bottles. Screw on caps (or cover with metal cap if using glass bottles) and shake bottles vigorously. Allow to sit 10 minutes, then shake the bottles again. Remove caps and empty all cleaning solution into a large bowl. Use this solution to clean any other equipment you may be using for bottling. Do not rinse.

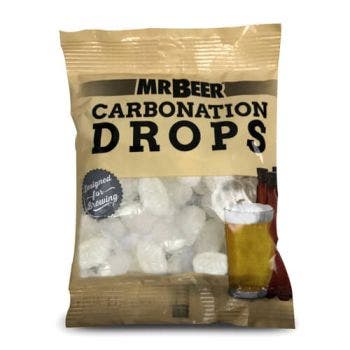
    3. Add 2 Carbonation Drops to each 740-mL bottle. For 1-liter bottles, add 2 ½ drops; for ½-liter bottles add 1 drop. Alternatively, you can add table sugar using this table as a guide

    4. Holding the bottle at an angle, fill each bottle to about 2 inches from the bottle’s top.

    5. Place caps on bottles, hand tighten, and gently turn the bottle over to check the bottle’s seal. It is not necessary to shake them.

    6. Store the bottles upright and out of direct sunlight in a location with a consistent temperature between 70°-76°F or 21°-24°C. Allow to sit for a minimum of 14 days. If the temperature is cooler than suggested it may take an additional week to reach full carbonation. 


    Tip from our Brewmasters

    After the primary carbonation has taken place your beer is ready to drink. We recommend putting 1 bottle in the refrigerator at first for 48 hrs. After 48hrs. give it a try and if it is up to your liking put the rest of your beer in the fridge. If it does not taste quite right, leave the bottles out at room temp for another week or so. Keep following this method until your brew tastes just how you like it. 

    This process is called conditioning and during this time the yeast left in your beer can help clean up any off flavors. Almost everything gets a little better with time and so will your beer.

    Rated 5 out of 5 by bowersmch from First attempt suprise This was my first attempted brew. I figured if I brewed something that I could manage to drink, I would consider it a beginning success. It turned out that not only was I able to drink it, but I actually want to drink it. I set the bar low for my first attempt, that was a mistake. I was not a mistake brewing this fine beer. I usual drink a glass of beer several nights a week. I currently have two microbrews in the fridge that I reach past to grab my St. Patrick's Irish Stout instead. It's that good. I really can't see anyone being disappointed with this beer if you like stouts.
    Date published: 2016-03-02
    Rated 5 out of 5 by Malinows from Fabulous, even without Nitrogen I ordered this and made it, figuring I like Guinness. This stuff came out amazing. Dark, heavy, a nice firm head on it, and super smooth to drink. I added one pack of booster on top of the ingredients.
    Date published: 2016-01-06
    Rated 5 out of 5 by Jeff from Awesome Excellent by itself or I add a shot of strong coffee to each bottle for an awesome coffee stout
    Date published: 2015-09-30
    Rated 5 out of 5 by Mike V from Great brew This is the my second brew with the kit. I made it a coffee stout with some alterations to the recipe and adding coffee beans during firmintation. It turned out great really injoying it.
    Date published: 2016-03-23
    Rated 5 out of 5 by Chefcw75 from Shut up and down the Stout. Yes, a Stand out Stout. I made this Irish Stout with an additional Robust LME from Mr Beer. It was AWESOME! The flavor is dark, rich and creamy and held a dense head when first poured. If you like the commercial “G” stout then you might enjoy this brew.
    Date published: 2017-05-02
    Rated 5 out of 5 by Jim Mc from Awesome brew Bought two of these around Christmas. It was on sale. Brewed it in December because I wanted it to be ready for our Super Bowl party. I did add some extra grains to boost up the body as I was going for a hearty stout. Used both cans of the stout malt and LME soft pack. I cooked the following grains first; 1.5 lbs 2 row, 2oz chocolate, 2oz roasted barley, 1oz carapils. I also added extra hops, .25 oz willamette at 60 minutes and .25 oz willamette at end of boil. Then I added the Irish stout malt mix and fermented in a five gallon bucked. Did a secondary fermentation in glass carboy. Made a four gallon batch. Served this at our Super Bowl party and it was a Hugh hit. Smooth and heavy with a thick head!
    Date published: 2017-03-17
    Rated 5 out of 5 by KeithTexas from Good tasting Irish Stout I brewed the standard St. Patrick's Irish Stout with two weeks of fermenting time and three weeks of conditioning/carbonating time. I put it side-by-side with a famous stout and it was close. Next time I would go with the deluxe package and go a full three weeks of fermenting time. But this one was very good.
    Date published: 2016-01-08
    Rated 4 out of 5 by Stormin Norman from Returning to the stout with a wake-up call! Recently retired, I just returned from New Orleans and a day @ the Jazz Fest. My friend there had asked me what my hobby was and I told him Home Brewing! It was in New Orleans years ago that I discovered Guiness stout and mixed it up with Dixie beer to make a black and tan! Now I'm mixing the St. Pat's with coffee(Café Du Monde, of course) as Jeff here suggested,,,I can test it while conditioning in the fridge and add the coffee incrementally...so far, so fine...
    Date published: 2016-04-29
    • y_2024, m_9, d_7, h_6
    • bvseo_bulk, prod_bvrr, vn_bulk_3.0.42
    • cp_1, bvpage1
    • co_hasreviews, tv_113, tr_154
    • loc_en_US, sid_90-11965-00, prod, sort_[SortEntry(order=RELEVANCE, direction=DESCENDING)]
    • clientName_mrbeer
    • bvseo_sdk, p_sdk, 3.2.1
    • CLOUD, getReviews, 9.87ms
    • REVIEWS, PRODUCT

    Does the refill kit come with everything or do I need to buy extra ?

    Asked by: Ronfrombrea
    The only item not included in this refill is carb drops. Cheers!
    Answered by: MRBEER
    Date published: 2022-12-07

    Two bags of booster came with the kit. What is the result with one bag? Two bags? No mention of this in the instructions. Just add it in the boil, or what? Thanks!

    Asked by: Nonsuch
    Hello! Each Booster brings up the ABV by a little over half a percent so you can add one or none for a "weaker" beer. Head over to the instructions tab at this link to learn more about adding the Booster to your brew. https://www.mrbeer.com/st-patrick-s-irish-stout-standard-refill Cheers!
    Answered by: MRBEER
    Date published: 2022-04-01

    What is the shelf life of the refills.  I have some old ones from about ten years ago.  I figured they were bad, but thought I’d ask.  Thanks, Jeff

    Asked by: Watz
    Hello! That's a bit "long in the tooth" for a refill, we recommend disposing of it at this point. Cheers!
    Answered by: MRBEER
    Date published: 2021-10-19

    It says it comes with everything needed, but doesn't mention if it comes with carbonation drops. Do i have to buy those separately? Thanks.

    Asked by: Trev
    Hello! Great question! Believe it or not, carb drops are just sugar! This is why they are not included with "standard" and "deluxe" refill bundles. You can purchase them separately. They can be found here: https://www.mrbeer.com/mrbeer-carbonation-drops alternatively, if you wanted to save a few bucks, you can also use table sugar with our priming chart, found on the same page as the carb drops. Cheers!
    Answered by: MRBEER
    Date published: 2021-07-14

    Do I need to put booster in this when I boiling my wort and do I need carbonation drops when bottling?

    Asked by: Irishbuzzin28
    The booster is not required all though it does help increase your ABV. You do not need to use carbonation drops you can use regular table sugar for bottling.
    Answered by: RobertMrBeer
    Date published: 2021-03-22

    Does all beer have to ferment at the temp.of 68°and up?

    Asked by: Darrell
    Darrell, The different types of yeast dictate what temperature ranges you must use the yeast. 68° is ideal for the dry ale yeast that comes with our refills.
    Answered by: Josh Beer
    Date published: 2021-03-14

    Is only one refill good for 2 gallons, or do I need to buy 2 refills?

    Asked by: sirKhevzz
    • y_2024, m_9, d_7, h_6CST
    • bvseo_bulk, prod_bvqa, vn_bulk_3.0.42
    • cp_1, bvpage1
    • co_hasquestionsanswers, tq_7
    • loc_en_US, sid_90-11965-00, prod, sort_[SortEntry(order=LAST_APPROVED_ANSWER_SUBMISSION_TIME, direction=DESCENDING)]
    • clientName_mrbeer
    • bvseo_sdk, p_sdk, 3.2.1
    • CLOUD, getContent, 253.85ms
    • QUESTIONS, PRODUCT
    We found other products you might like!